
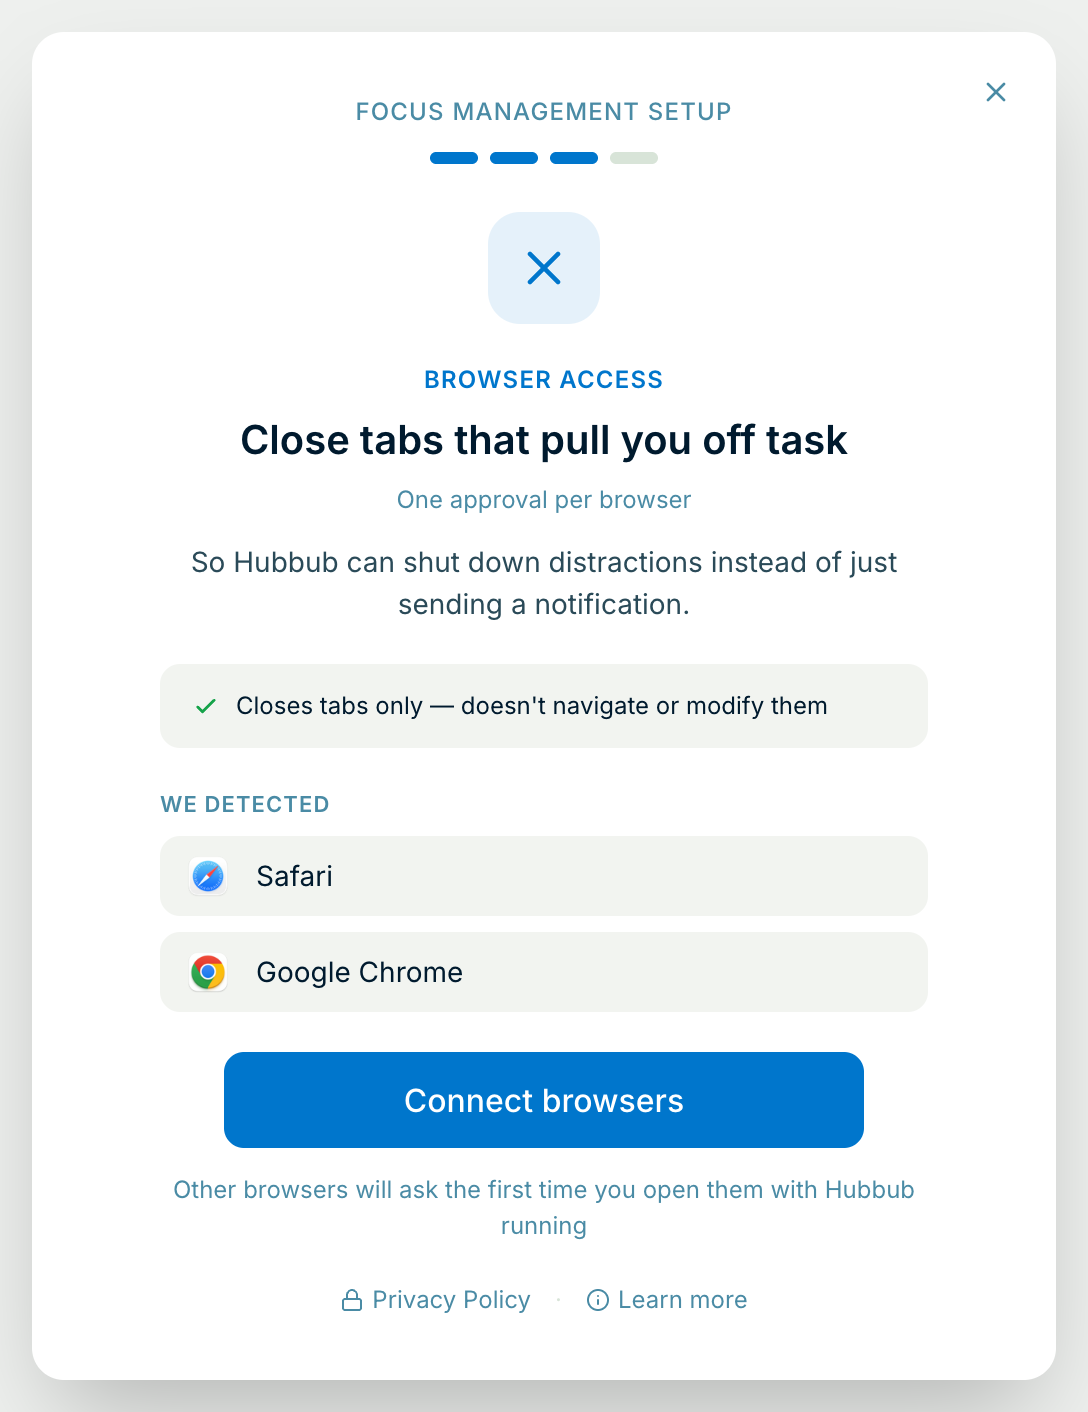
Step 1: Click Connect browsers
Hubbub's Browser Access screen lists the supported browsers that are open right now. If none are open, Hubbub skips this screen — each browser asks later instead (see below).
Mac setup
One quick approval per browser. It lets Hubbub see which page you're on and close a single distracting tab, instead of quitting your whole browser.
Hubbub's Browser Access screen lists the supported browsers that are open right now. If none are open, Hubbub skips this screen — each browser asks later instead (see below).
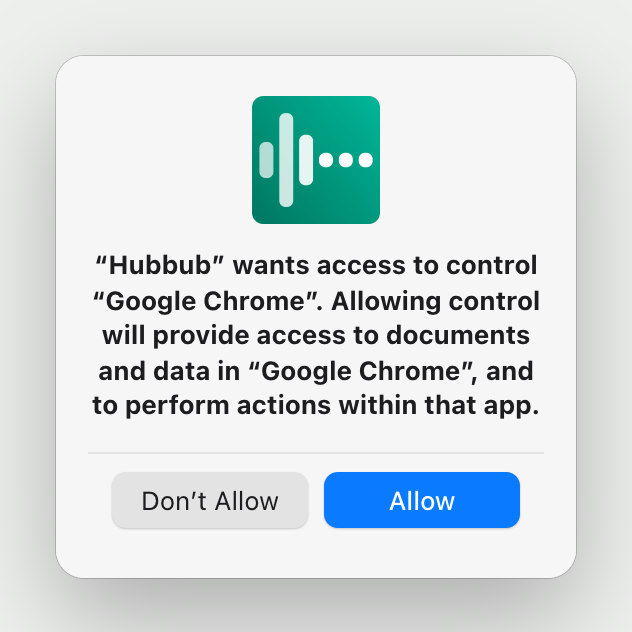
macOS shows one box per browser, one after another. It's the same standard wording macOS uses for any app.
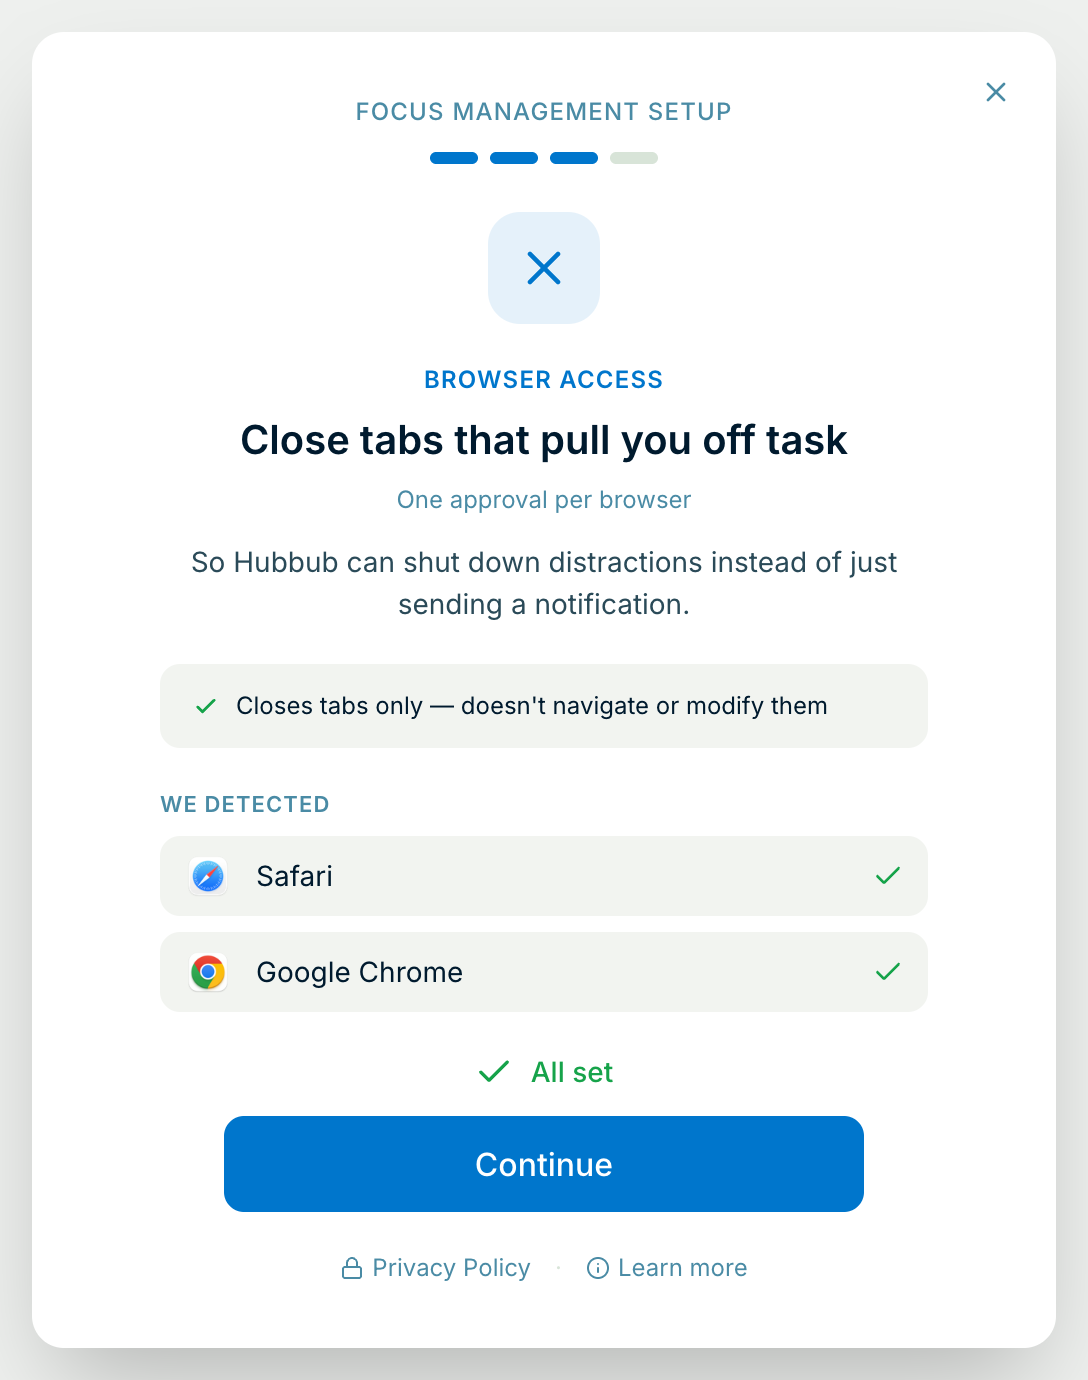
Each browser gets a tick as you answer. The step finishes whatever you choose — a browser you said no to will simply ask again later.
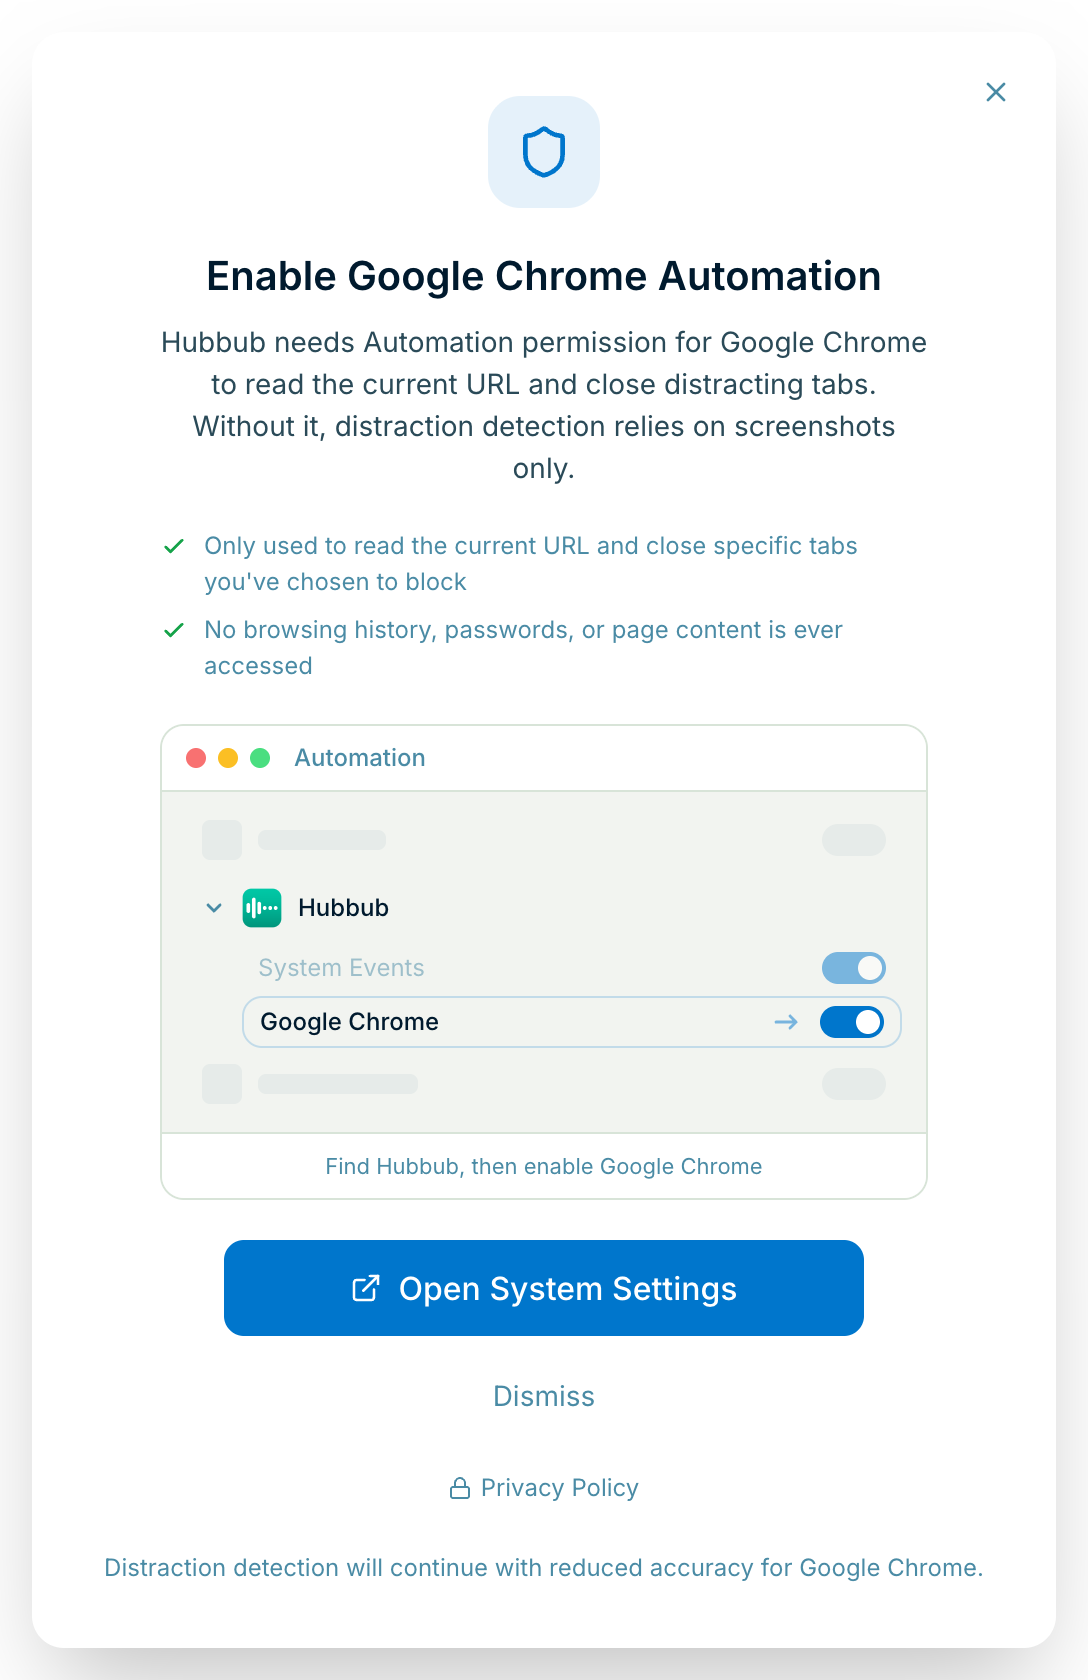
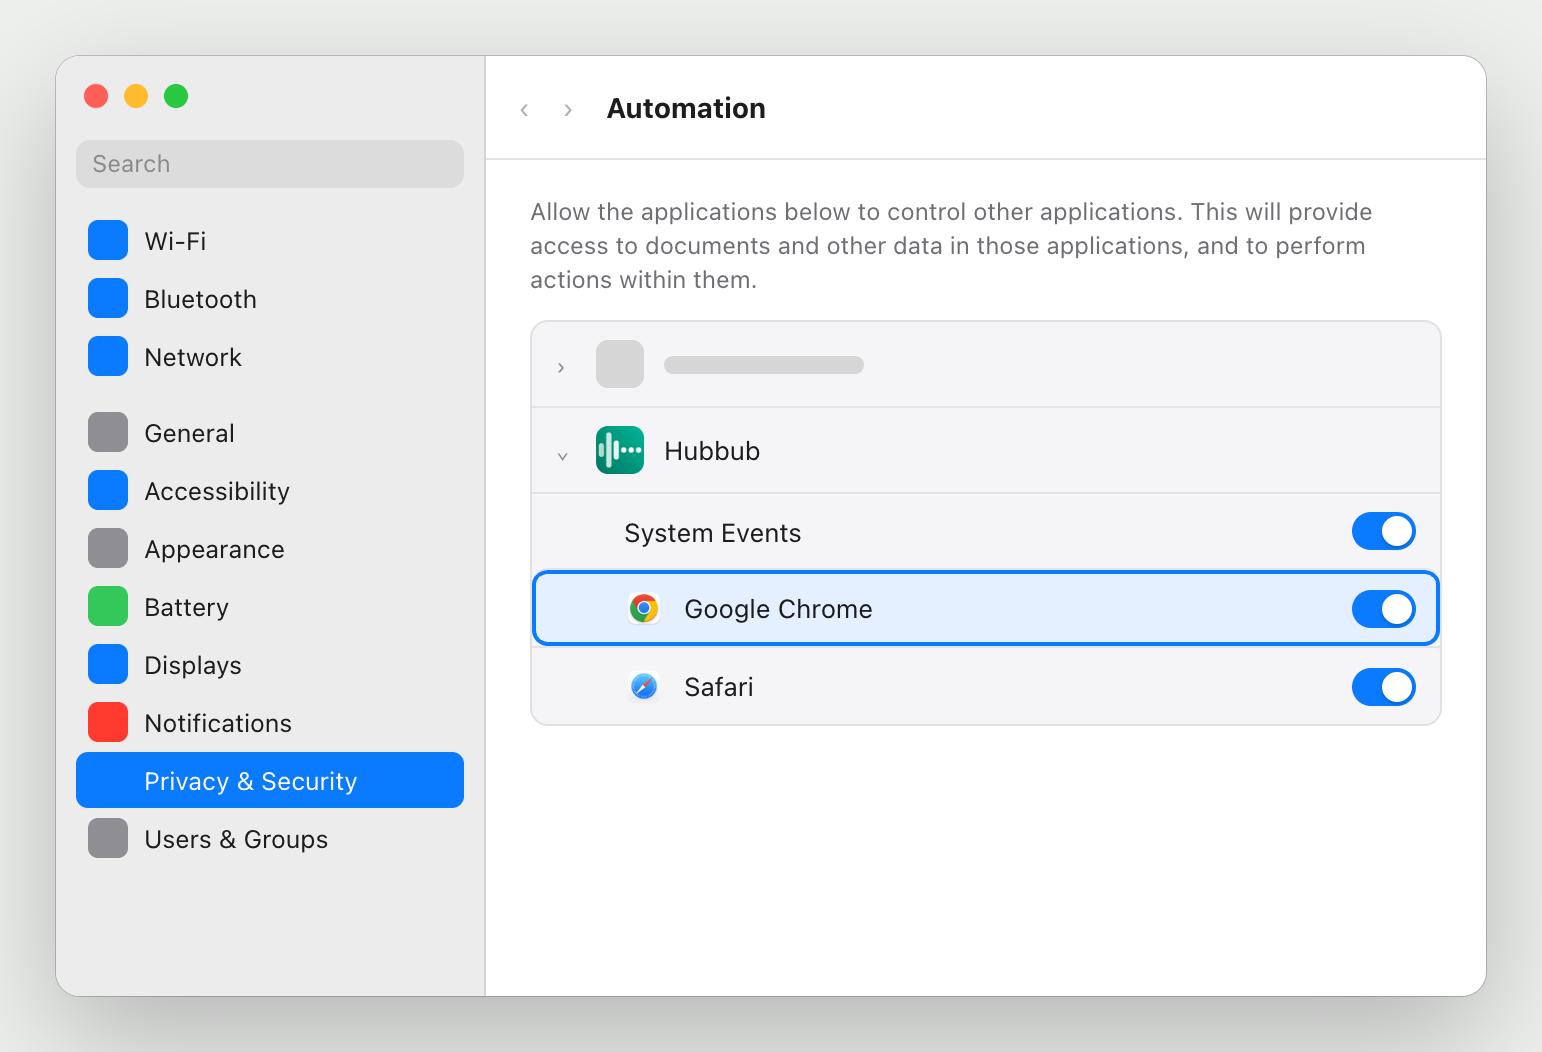
The first time Hubbub needs to read a tab in a browser it hasn't been allowed into, it shows a full-screen card naming that browser. Click Open System Settings: in Privacy & Security → Automation, expand Hubbub and switch the browser on.
Dismiss also works — Hubbub keeps going for that browser with less to go on, and asks again after you next quit and reopen that browser, or Hubbub.
Every browser Hubbub has asked about appears under Hubbub in Privacy & Security → Automation, next to System Events. Each has its own switch, so you can allow one browser and not another.
Hubbub keeps working. For that browser it has less information about which page you're on, and when it needs to stop a distraction there it has to quit the browser rather than close one tab.
The other things Hubbub's setup asks your Mac for are on the Mac setup overview. Stuck, or something on screen doesn't match what's described here? Email support@77sparx.com and we'll walk you through it.